
Video Resources – More Information on Risk Assessment
This section provides video suggestions that may help in the preparation of a training or can be utilized as a training tool to help trainees understand theme concepts. Some of the videos can also be used as a visual demonstration when you are nor able to set-up real-life activities. Here are some suggested video resources that contain relative information, but please feel free to research others:
Hazard vs Risk - Same Difference? (Risk Bites)
Captain Safety Episode 4 - Avoid Workplace Hazards (Volusia County Safety Committee)
Hidden Hazards in Your Home (Insurance Information Institute)
Kitchen for Trouble (National Fire Protection Association)
NFPA's New Electrical Safety PSA (National Fire Protection Association)
Visual Aids – PowerPoint Presentation
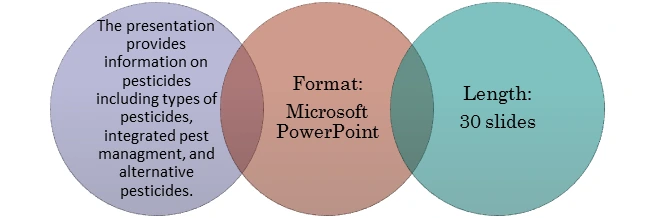
The PowerPoint presentation provided is a prepackaged visual aid that can be utilized to train promotores on the respective theme of the module. It is meant to be adaptable and should be modified according to the audience needs and knowledge base. The information in the presentation is similar to that in the “background” section of this module. Certain terms and/or ideas may not be in the “background” section, thus a separate glossary is provided in this section to assist in defining.
Presentation Concept Glossary
- Animal models - Refers to scientific studies and tests conducted on animals to observe how they react to a substance. Usually, these animal models help predict reactions in humans.
- Chemical Toxicity – Type of toxicity that is characterized to be a result of a particular chemical. In the example provided in the presentation it would be the difference levels of capsaicin that gives the chili its spiciness.
- Dose - Quantity of something. In this case, the quantity of a substance that you or a population if being exposed to.
- Exposure - The act of encountering a hazard. When there is an exposure to a chemical it is the act of the chemical entering the body (inhalation, ingestion, or dermal) through liquid, soil/dust, air, or contaminated food. Exposure depends on how much of a hazard a person contacts and the length of time they are in contact with the hazard.
- Flammable – The potential for something to burn easily.
- Food and Drug Administration (FDA) - The government agency responsible for protecting the food supply and identifying what medications can be sold in the US market.
- Mold – a fungus that can grow food and other surfaces.
- Occupational Safety and Health Administration (OSHA) - The government agency that is in charge of protecting the health of workers.
- Precaution - A security measure that prevents damage.
- US Environmental Protection Agency (US EPA) - The government agency that implements environmental regulations.
Training Assessments and Extensions
- Have the promotores write a list of some of the hazards that are found in their homes. Then have them write the risks that these hazards represent. Afterwards, have them discuss how variability can affect the risk (e.g., lifestyle, number of times exposed, etc.). Have them present their ideas or answers on a board or flipchart to the other promotores.
- Ask the promotores to comment or demonstrate how they would explain risk assessment to children in the 5th grade. They can organize themselves into groups to plan the explanation and present how they would proceed. Promoters in the audience listening to the explanation can fill the role of the 5th grade children.
- Ask the promoters to make a list of the jobs their family members do for a living and have them identify what agency/organization would use risk assessment to develop permissible exposure limits or human health guidelines.
- Have the promotores identify chemical substances in cleaning products or beauty products that you have provided. After they have compiled a reasonable list, have them research on-line about the potential health effects of these substances. Next, have them write down these potential effects and list them next to each chemical substance. They can have a group discussion on their individual top three chemical substances that they have researched.
Concept Activities
These complimentary activities were designed to provide a hands-on component to the module trainings. They may be used to demonstrate a concept to visual learners or reinforce ideas presented to ensure comprehension. The activities have been divided into three sections (warm up, activity, and wrap up) in order to guide promotores through the concepts(s). Also, some activities have “cheat sheets” for the trainer or handout materials that can be copied and handed out tot the promoter at the training. Similar to other components in these modules, they may be adapted as needed considering the training time, knowledge base, or available materials.
Activity 1. Caution with Chemical Substances in Your Home
Materials
- See-through storage containers with lids (the containers should be identical)
- Liquids and solids (each group of liquid/solid are placed in identical containers and labeled with a code at the bottom that allows you to identify the liquid/solid that is contained)
- Liquids:
- Strawberry soda - red color (e.g., Crush Strawberry Soda)
- Laxative - red color (e.g., Aaron Health Magnesium Citrate Cherry)
- Sports drink - red and blue color (e.g., Gatorade Fruit Punch or Frost Glacier Freeze, PowerAde Berry Ice or Mountain Blast)
- Anti-diarrhea medicine - pink color (e.g., Pepto-Bismol®)
- Liquid soap - pink color (e.g., Ultra Palmolive® Soft Touch Vitamin E Dishwashing Liquid)
- Water - clear
- Rubbing alcohol - clear
- Liquid soap - blue color (e.g., Gain® Ultra Bleach Alternative Honeyberry Hula Liquid Dish Soap)
- Glass cleaner - blue color (e.g., Windex® Original Glass Cleaner)
- Solids:
- Candy - pink color (e.g., Willy Wonka Strawberry Nerds®)
- Fabric softener - pink color (e.g., Gain® Scent Booster Fireworks Sweet Sizzle)
- Candy - assorted colors (e.g., Smarties®)
- Antacid tablets - assorted colors (e.g., Tums® Assorted Fruit)
- Moisture control - white color (e.g., DampRid Moisture Absorber)
- Mints - white color (e.g., Tic Tac® Peppermint)
- Liquids:
Warm Up
Inform the promotores that every 13 seconds the Poison Control Center receives a call that is related to the exposure to a toxic substances. In fact, 40% of these cases involve children less than three years old. Ask the promotores if they have any experiences related to accidental poisonings in the home. Listen to what their experiences are regarding accidental poisonings in the home.
Mention to them that in this activity they will be observing different liquids and solids in order to distinguish what they are. The goal is to emphasize the importance of keeping toxic materials in their original containers in order to avoid confusion as well as the accidental poisoning, injury, or even death of a person.
Activity
- Group the liquid and solid colored substances on a table so that the promotores can observe. The following is the grouping scheme:
- Liquids
- Red Group: strawberry soda, laxative, and red sports drink
- Pink Group: anti-diarrhea medicine, and pink liquid soap
- Clear Group: water and alcohol
- Blue Group: blue liquid soap, window cleaner, and blue sports drink
- Solids:
- Pink Group: pink candy and fabric softener
- Multicolor Group: assorted color candies and antacid tablets
- White Group: moisture control and mints
- Liquids
- After they observe from a distance the liquid and solid substances, let them know that in this activity they will have to identify the contents of the containers.
- Split into the promotores into groups (group number depends on how many promotores are participating in the training).
- Provide each group of promotores with a set of solid or liquid group schemes provided in step 1. Put the group of solid or liquid that they will be assigned in the middle of the table where the group is located.
- Before the promotores begin, let them know that the only rule of the activity is not to open the containers. They can only observe them.
- Give them 10 minutes to work in groups and identify the contents of the containers that they were assigned.
- After the 10 minutes is over, each group will comment on their speculations about the contents of the containers.
- At the end of the activity, give them the name of the substances that are contained in each container so that they are aware of what is really in them.
Wrap up
After the activity, discuss with them the importance of keeping toxic substances in their original packaging and avoiding placing these products in containers that are typically used for food. Ask them, what changes can be made in their home to reduce risk? Also, discuss with them the risks of not properly storing medicine or chemical substances (Table 7).
| Substance | Risks | Prevention Strategy |
|---|---|---|
| Medicine | Intoxication Death | Do not store them in bedside tables or drawers where children may have access to them. |
| Chemical Substances | Intoxication Death | Keep them in their original packaging. Never place a chemical or a medicine in a bottle used for juice or soda. Do not put chemical substances near food. Make sure that the labels are in good condition, if not put a label with the product name. |
Activity 2: Hazard vs. Risk Comparison
Materials
- Copies of the worksheet “Hazard vs. Risk”
- Pen or pencil to complete the worksheet
Warm Up
Ask the promotores if they were clear with the explanation about the difference between risk and hazard. Depending on their answers, discuss with them their perceptions about risk and hazard. Remind them that risk is basically the probability that a hazard can affect humans and/or the environment and the hazard is anything that may pose a threat. Tell the promotores that in the following exercise will be identifying the risk for each hazard.
Activity
- Give each promotor a worksheet and a pencil or pen.
- Have them work individually on the worksheet. Have them match the hazard with the appropriate risk.
- Tell them they will have five to ten minutes to complete the worksheet.
- When each promotor completes the worksheet have them share their answers aloud.
Wrap Up
After the activity, discuss with them the importance of the hazards and risks that are presented in the worksheet. Asked them to discuss the affects of variability and if they know someone who has been affected by one of these risks. Also, you can discuss with them the government agency that would carry out a risk assessment process to establish permissible exposure limits or human health guidelines for hazards presented.
Activity 3. Lead: The Silent Epidemic
Materials
- Items that contain lead*, such as:
- Ceramic pots that contain leaded paint
- Fishing weights
- Sweets or candy made with chili or packaged in ceramic pots imported from Mexico
- Glasses or containers with glass-based glaze
- Imported crayons
*Test the items previously to make sure that they result in a positive/negative spot test.
- Items that do not contain lead*
- Spot test kit for lead (e.g., 3M™ LeadCheck™ Swabs)
- Gloves
- Re-sealable zip storage bag (collect used spot test materials)
Warm Up
Ask the promotores if they can name some of the potential items that may contain lead in their home. Listen carefully to what they say. Mention to them that a case of lead exposure will typically follow by an assessment of the home, taking into account certain characteristics. Some of these characteristics include the construction year of the house (before 1978 may contain lead-based paint), certain ceramics and glass utensils used in the kitchen, candies or sweets consumed, old plumbing, and even everyday items. Tell the promotores that in this activity they will me performing a test that determines the risk of lead contained in items that may be found in the home.
Activity
- The promotores will be divided into small groups or they can also work individually according to the preference of the trainer.
- Provide each promotor a pair of gloves, two items that they will sample (one contaminated with lead and the other lead-free) and the spot test kit for lead.
- Once the materials are distributed, demonstrate to them how the spot lead test is conducted. Let them see what a positive test looks like and what a negative test looks like (follow the instructions provided in the spot test kit).
- After the demonstration, tell them to perform the test on the items that they have in front of them.
Wrap Up
When the promotores are finished testing for lead, begin a discussion with them about their thought on the items that contained lead. What are their reactions? Which groups/individuals were surprised about the items that have a positive test for lead?